Skimmer Assembly & Operation
In this article I will describe how to assemble & install a Super Reef Octopus - SRO Internal skimmer. This is the brand & model I use here at AquaCorals. All sizes of the SRO skimmer family assemble the same.
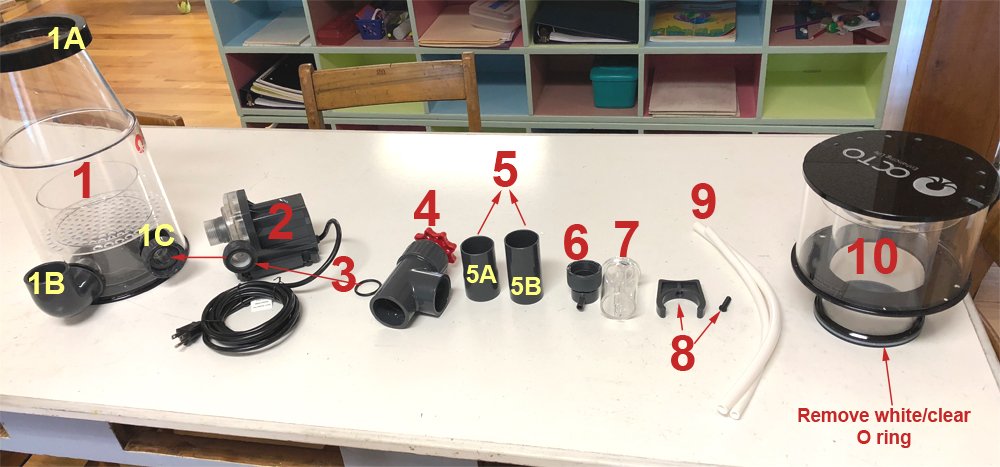
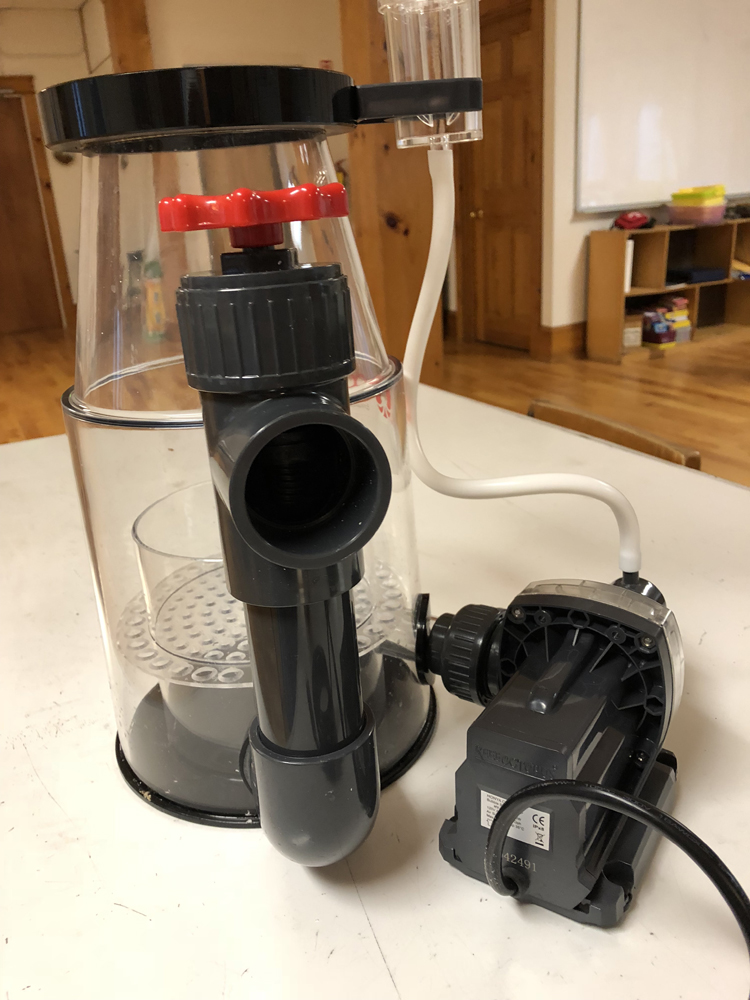
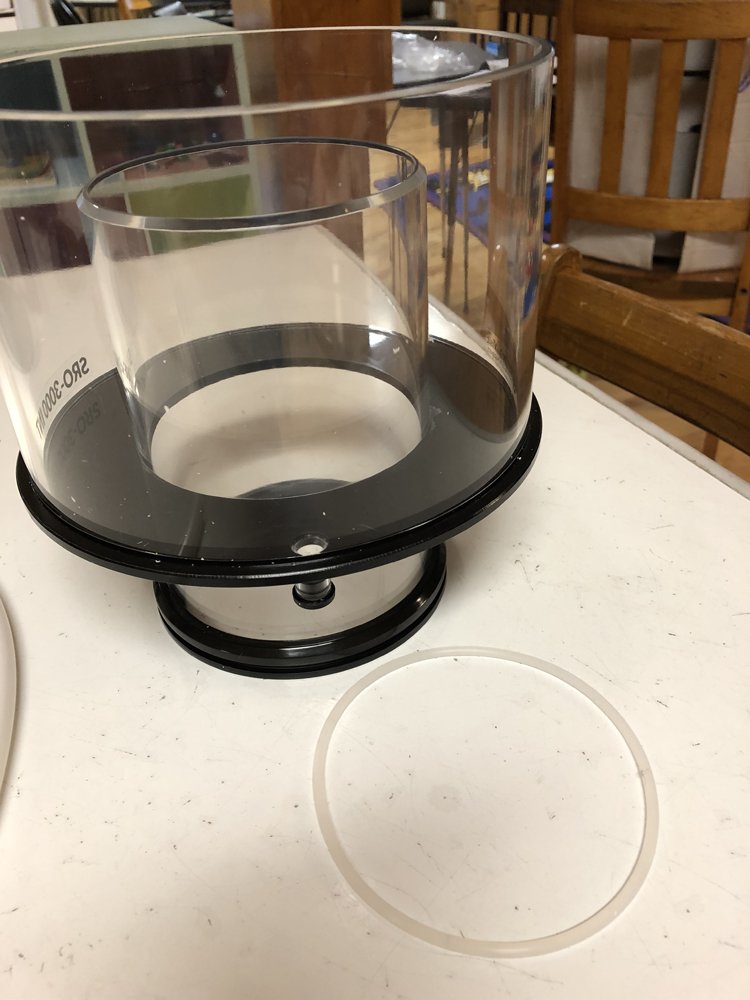
Above is a picture of a newly received SRO 3000 skimmer with it's parts laid out. Main components are numbered in RED as follows:
1 = Main skimmer "body"
2 = Skimmer pump
3 = O ring for pump
4 = Gate valve (controls water flow out of the skimmer which also adjusts the water level "inside" the skimmer)
5 = Gate valve extension pipes
6 = Pump air intake valve
7 = Main air intake
8 = Main air intake bracket/holder & screw
9 = Air intake hose AND skimmer cup drain hose
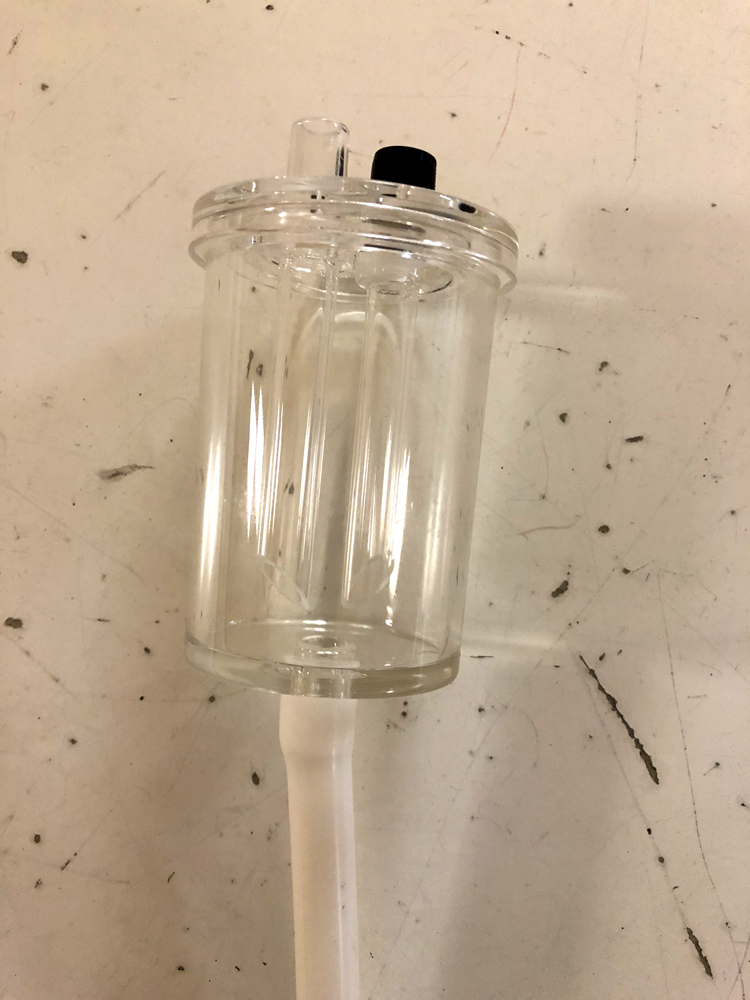
10 = Skimmer collection cup
To Assemble (flat head screwdriver needed):
Place the skimmer body on a flat surface.
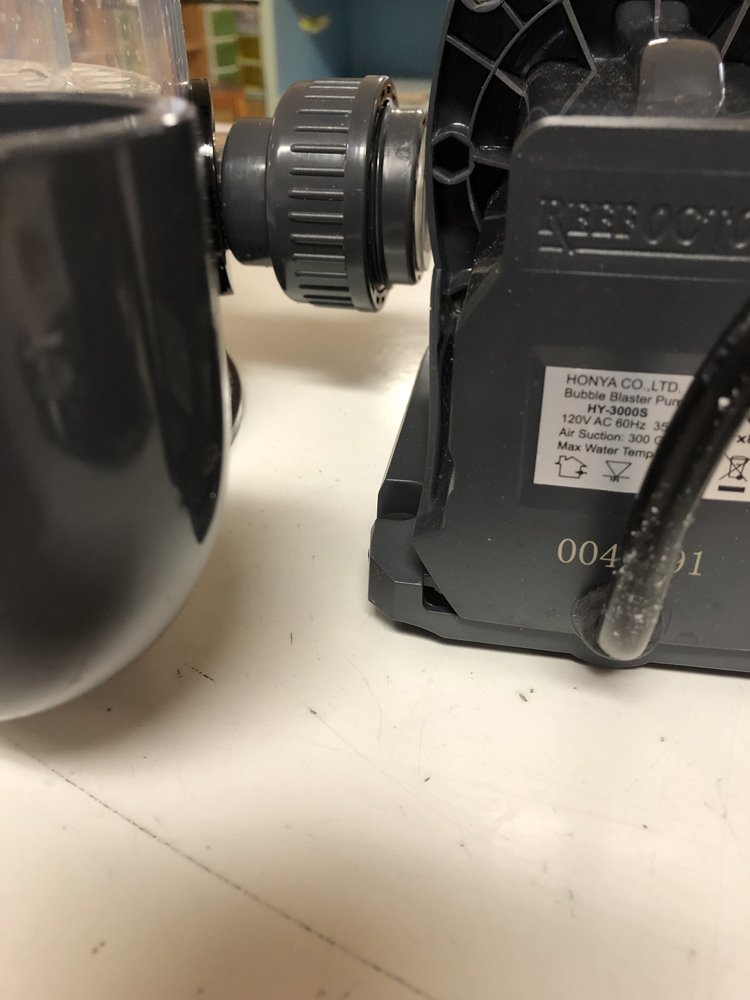
Take the pump (part 2) & on the "union" connection side (shown in the pic above) make sure the rubber O ring (part 3) is installed inside the groove.
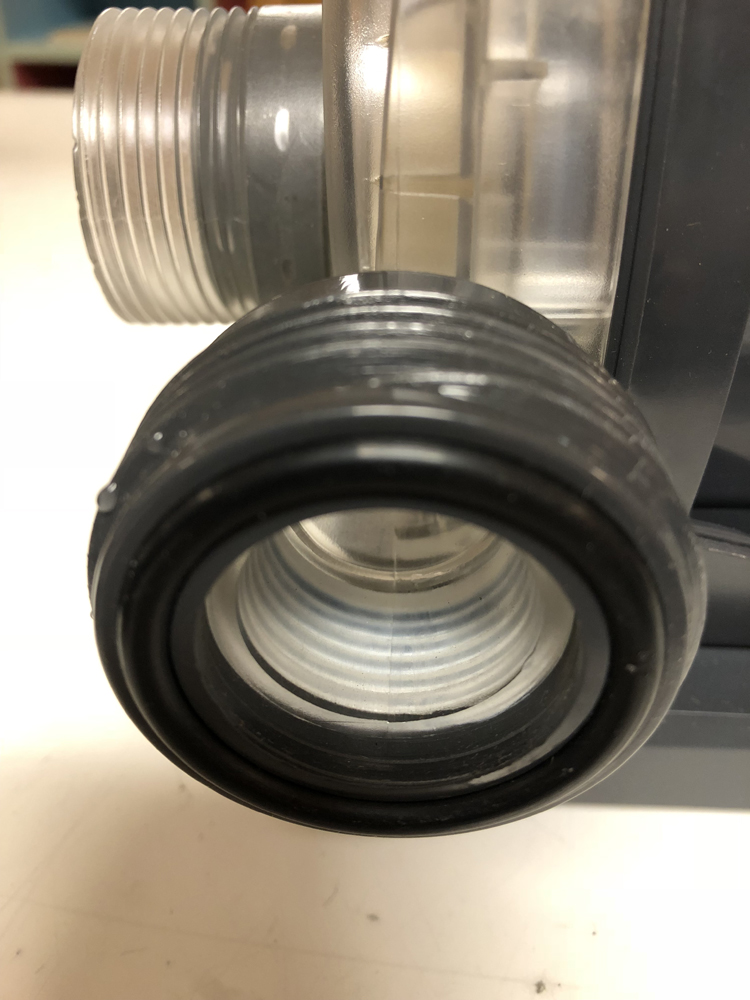
With the O ring installed you will put the pump up to the skimmer body connection (1C) & connect the pump via the union. Tighten firmly but do not over tighten.
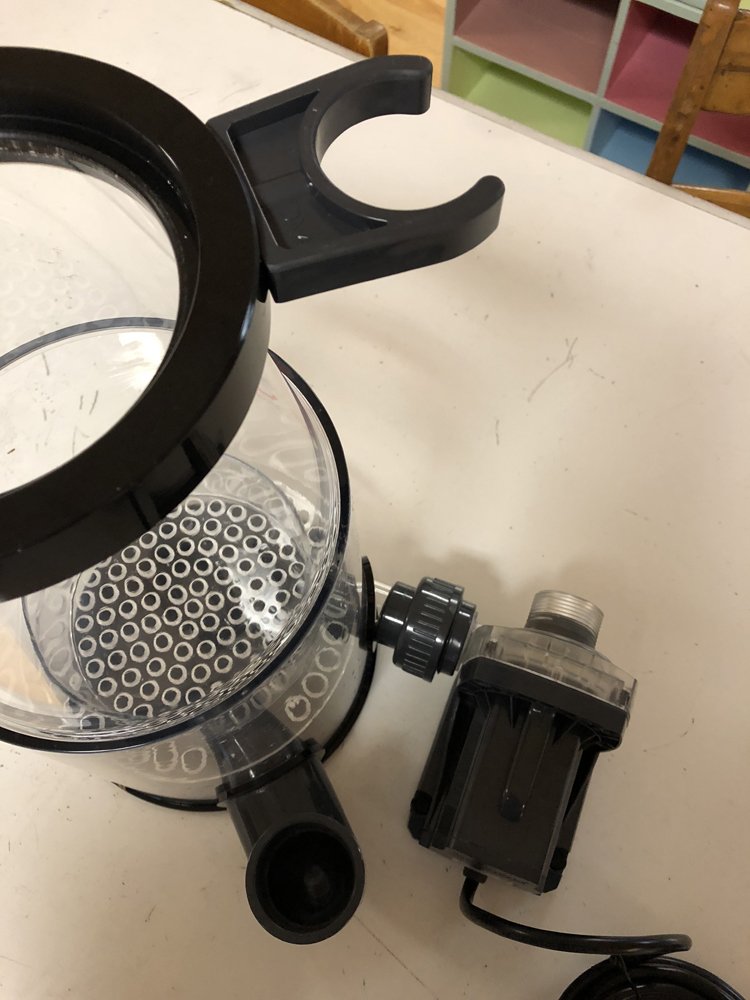
Now take part 8 (bracket/holder & screw) & attach the bracket to the skimmer neck (1A) by inserting the screw (screwdriver needed) into the bracket & into the hole in the neck (1A).
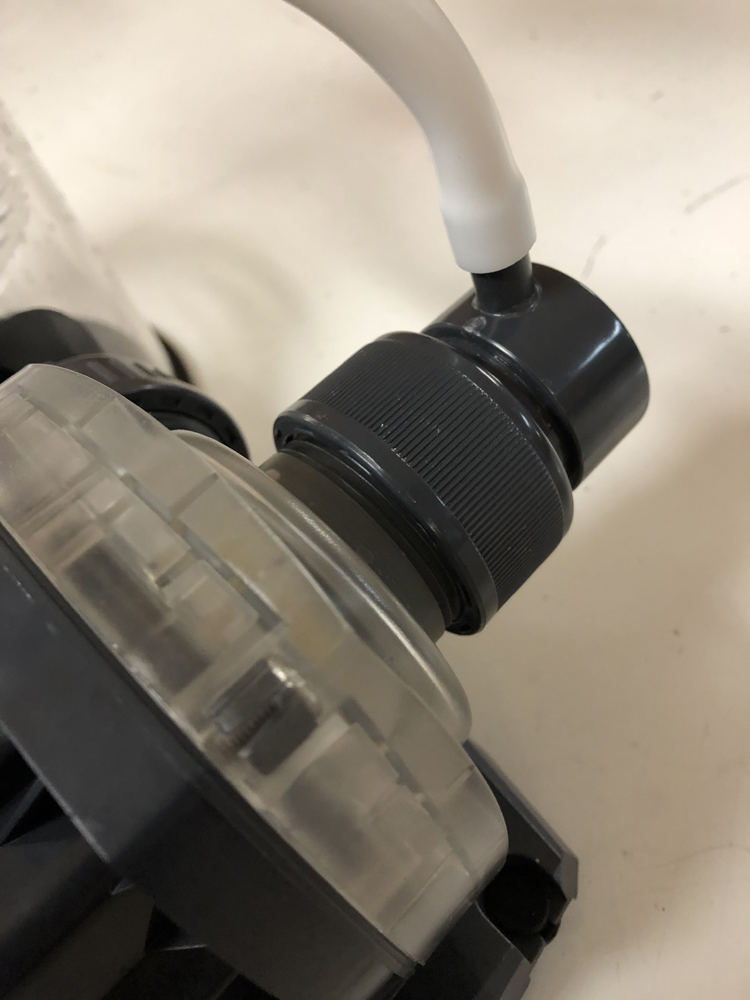
Next take the main air intake (part 7) and one hose (part 9) & slide the hose onto the bottom of the air intake. Warming the hose end with hot water will help make it slide on easier.
With the hose on the bottom of the air intake you can drop the air intake into the bracket & press it into the bracket until it won't drop in any further. Do not force. Remove any black caps on the main air intakes. These restrict air flow into the skimmer. We want to run the skimmer air intake wide open .
Next take the pump air intake (part 6) & screw onto the pump's intake.
Take the air intake hose you just installed to the main air intake & slide it on the pump's air intake.
Now take a gate valve extender (part 5B) & slide it into the skimmer body discharge (part 1B)
Take the gate valve (part 4) & slide it down on top of the gate valve extender (5B - longer completely straight piece). None of these parts are glued as they are meant to be free to turn so you can control the height & direction of the discharge = water coming out of the skimmer. For most applications part 5A (another extender - shorter of the 2 extenders, it is tapered on one end to accommodate different pipe sizes) isn't needed but keep just in case.
Next you will want to remove the clearish white O ring from the neck of the skimmer cup (part 10). It's meant to secure the cup to the skimmer body but I've found the cup to be heavy enough to sit fine & operate perfectly without it. Leaving this O ring on makes it difficult to remove the cup from the body when you want to clean it. I learned the hard way that when it does release it's usually a quick POP & I almost always spilled skimmate all over the place! If you want to see what I mean, set the cup onto the top of the skimmer with the O ring installed then try to remove the cup. ;c) Again, the cup is heavy enough not to need this O ring so I recommend removing it.
At this point your skimmer is ready to place in your sump. Placement is important so here are some tips - read through before placing:
1. You want your skimmer as far away from your system pump's intake as possible. Skimmers generate bubbles so we want distance to help keep the pump from picking up any bubbles generated by the skimmer's discharge.
2. Place your skimmer in the sump (without it's cup at this point). You will want to hold the pump in one hand & the skimmer body in the other & lower both together in the sump. Be sure there is no tension on the union connection between the pump & skimmer body as it can crack! Plug in your skimmer pump & let the skimmer fill to weight it down.
3. Turn the gate valve discharge (part 4 - NOT the red valve handle but the entire discharge piece) so it's water flowing out is directed away from the system's main pump. I like to have the discharge flow out against the sump side wall of bubble diffuser to help minimize water splashing & help remove micro bubbles. Be sure the discharge is "above the water"! This is important because if it's submersed it will cause the skimmer to build back pressure & it won't operate properly! Normally I run my sumps at about 6 inches deep. This provides enough outside water pressure against the skimmer body - in conjunction with the gate valve adjustment, allows for plenty of skimmer adjustment to get it running in it's "sweet spot" which is no skimmate buildup inside the skimmer "body" (part 1) but rather in the skimmer cup's neck & cup proper (part 10).
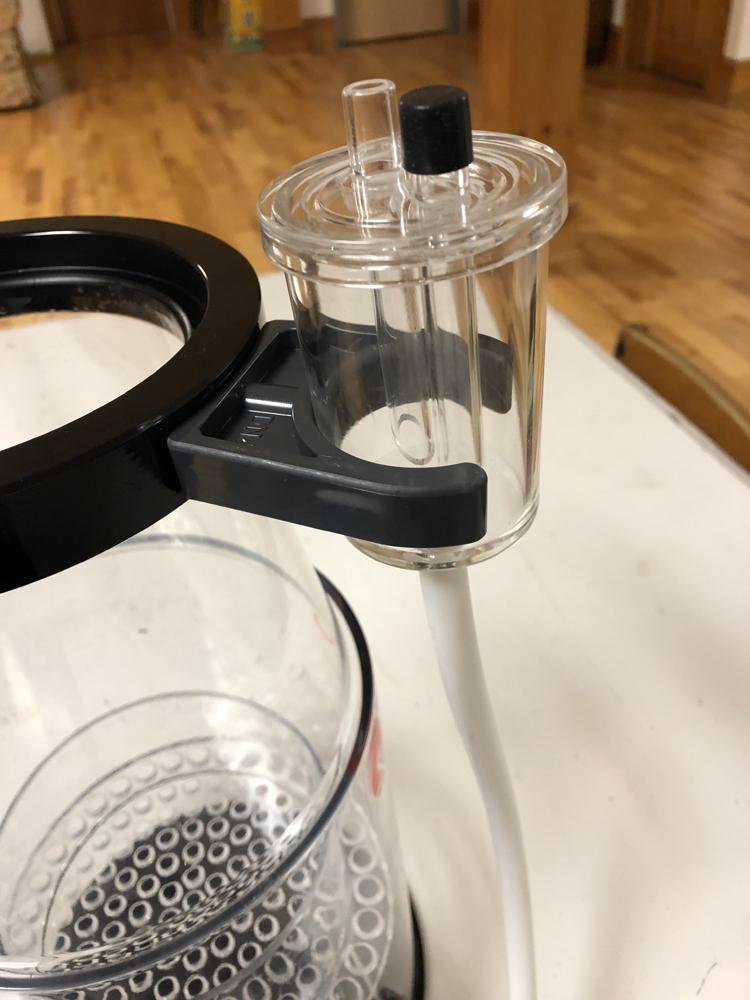
4. Place the skimmer cup on top of the skimmer body.
This is my 180g reef sump - a 32 gal tote with a 5g salt pail bubble diffuser. Not much room but it works!
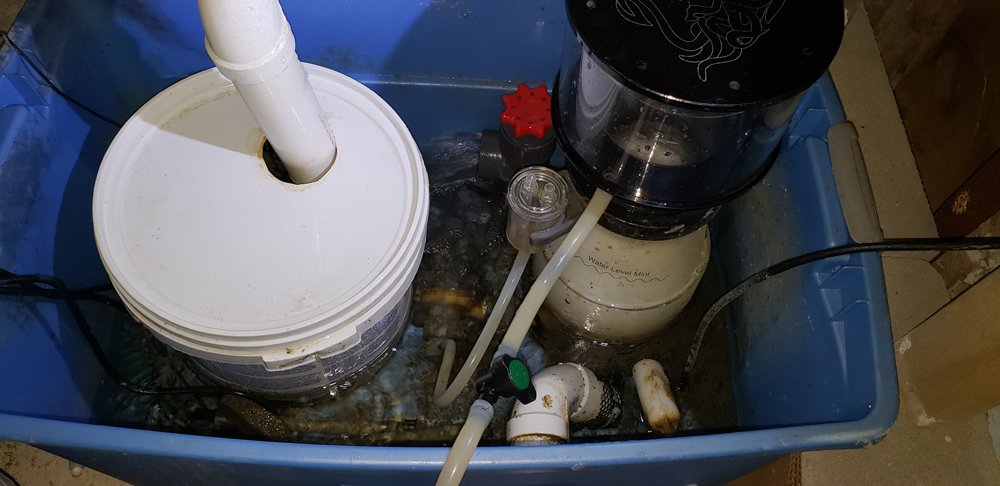
Below is a short video of my skimmer & sump operating. Note how I used the second piece of tubing (part 9) to drain the cup to a vinegar bottle. There is a drain plug under the cup head. Just pull out the plug & insert your tubing onto it. Cut the tubing & install a TLF barbed valve which allows us to just open the valve & dump the cup skimmate into the bottle. This greatly reduces how often we need to lift the cup to clean (though you still need to clean the cup itself occasionally ;c) Just never use this drain without a installing a valve & never leave this drain valve open - ever. If your skimmer over reacts & keeps filling the cup with the drain valve open it would just fill & possibly overfill your bottle...onto your floor & this would drain your tank AND if you have ATO (auto top off) it would flood your system with freshwater so again, never ever run this skimmer with a drain hose without installing a shutoff valve & never ever leave this valve open.

Skimmer Operation:
Now that your skimmer is in place & running we want to "dial it in" so that the bubbles reach & break in the collection cup. Understand new skimmers take about a week of running before they start to operate consistently. This is called the "Break In" period. The Mfg process leaves a microscopic film on the acrylic that makes the skimmer either over react or under react. Try not to worry. Just turn the red handle on top of the gate valve "slightly" (clockwise to close = brings water higher in the skimmer body) or counter clockwise (lowers the water inside the skimmer body) until the bubbles reach at least the bottom of the skimmer cup neck. Understand that the gate valve is extremely sensitive so you must make just a hair turn to the valve then wait at least a few minutes to allow the skimmer to respond to the new adjustment. Expect to have to make adjustments using this valve frequently during the break-in period. After that we almost never have to touch the gate valve to adjust again.
Consider giving the skimmer it's own on & off switch like a Belkin power switch (Amazon) or dedicate a power strip to it. You want to be able to turn off the skimmer before shutting down your system AND to turn it on when refilling from a water change - usually when your sump's water level is about one inch below your operating level when refilling at the end of a water change. I also HIGHLY recommend the purchase & installation of a Delay Timer (I sell under Skimmers) which will automatically delay the power from coming on to your skimmer if you experience a power outage. I personally use a Belkin power switch plugged into a Delay Timer with the skimmer plugged into the Belkin switch so I can manually turn the skimmer on & off via the Belkin without having to wait for the Delay Timer to kick it back on. This is important when you're refilling your system for a water change because you want to turn on your skimmer so it's filling draws the sump down.

Your Cart
Login Form
Visitor Hours:
Walk-Ins
Saturday's
Noon to 3pm
See "What's New"
below for more info.
Newsletter
Reviews
- Very happy with toadstool from AquaCorals
I just received a fat cap toadstool from Penny at AquaCorals and highly recommend her! ...
Diana · Reviews · 3 days ago

Gift Certificates
Buy your Reefer a Gift Certificate!
AquaCorals Info
Service Center
Shipping Policies:
Penny's Friends