Plumbing a Remote Sump
Plumbing a remote sump is easy. Try to keep the system simple in your mind...because it is. Water dumps down to the sump & your sump pump "returns" the water to your tank. No matter if your sump is under cabinet/stand or in a closet behind the tank or from a basement below. It all works the same. Dump & Return.
Below are some pictures from my 180g re-plumb from an under cabinet to a remote basement sump. Note how the larger 2" PVC pipe is slightly pitched so the water easily travels down the pipe to the sump in the basement below.
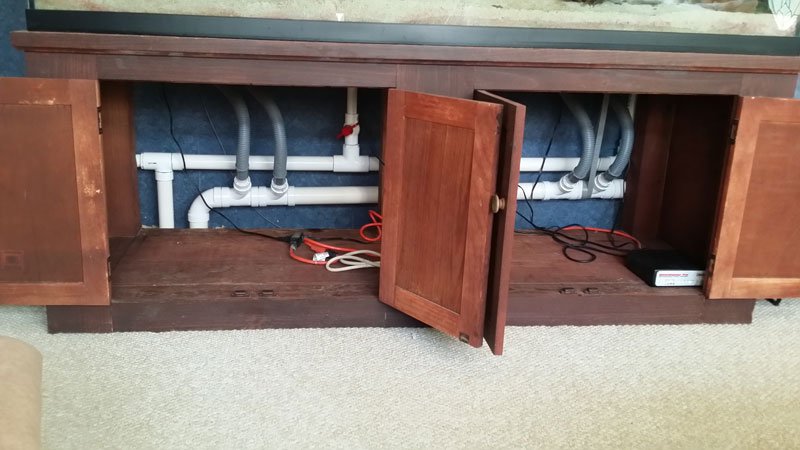
First pic = 1.5" PVC pump/return pipes & 2"PVC dump to sump pipe. Both pipes go through the floor to the basement below.
Another way to plumb it - right behind the tank itself then the dump & return pipes go through the floor- below pic courtesy of Jay's 210g
Please note that we do NOT use the black sponges seen in the overflow box sets. These were removed before starting the system. Reason being is they catch & kill any spawning activity from the tank, any fish that accidentally go over & the sponges also act as Nitrate factories. We want a free flowing system. This would include NO filter socks etc.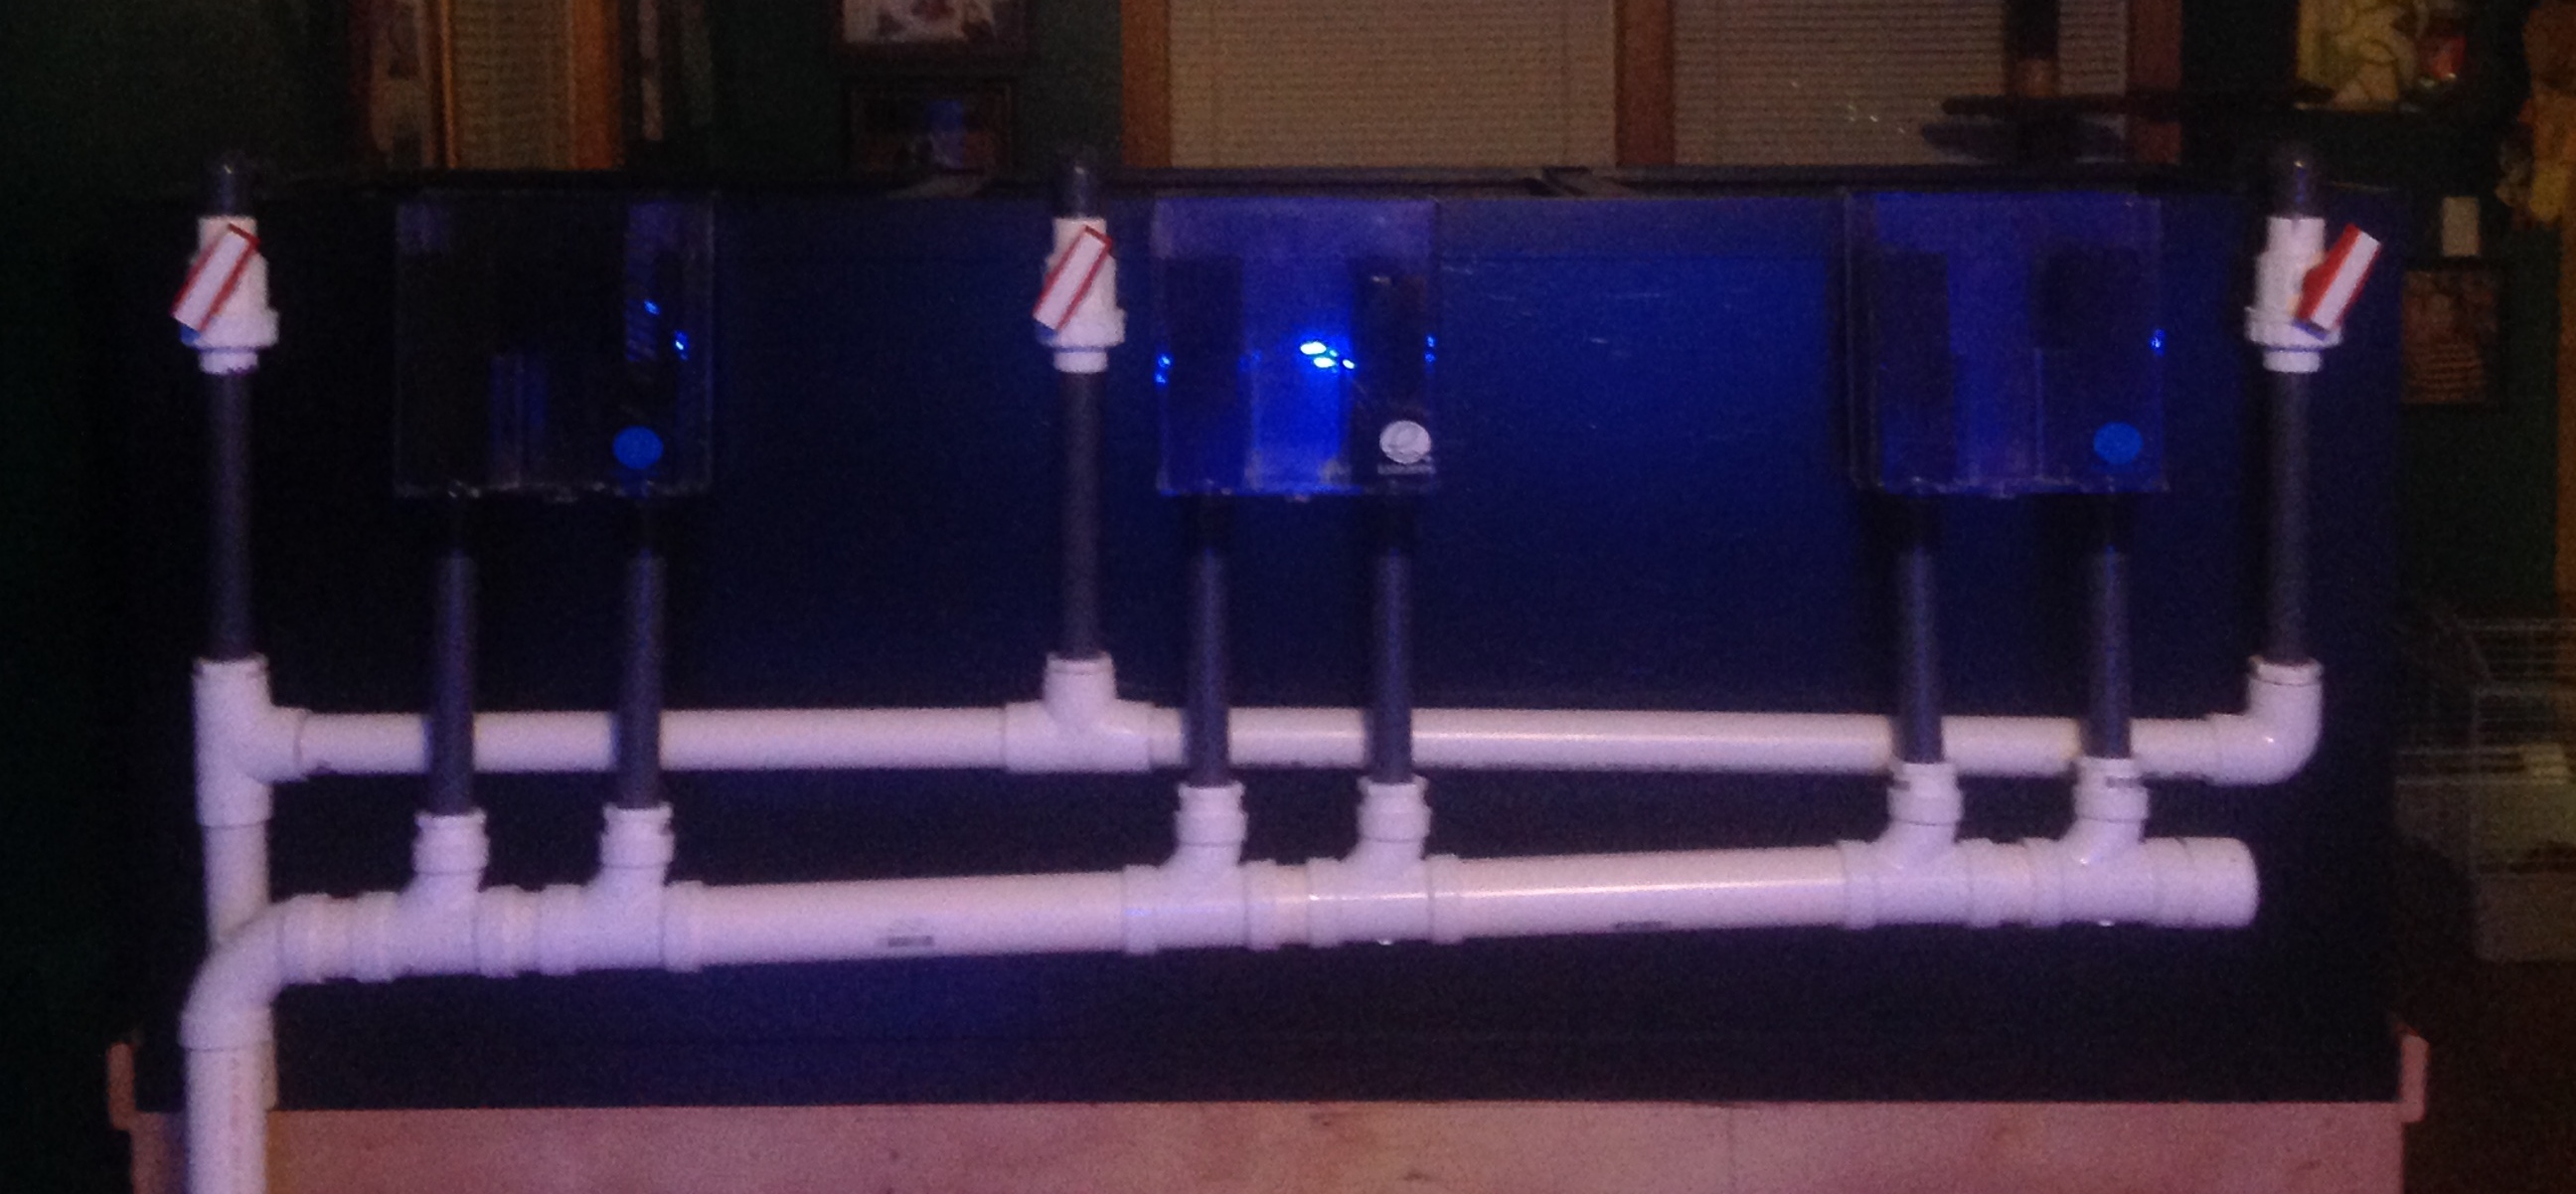
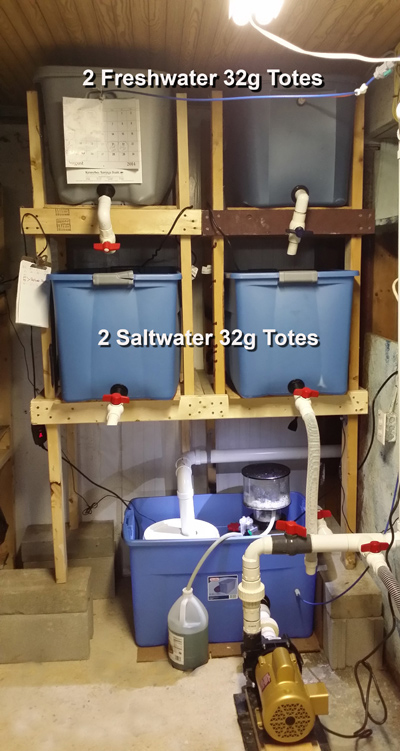
The below picture is my current water change rack for my 180g which consists of 2 freshwater totes & 2 saltwater totes. Though we only need to do 10% weekly water changes, I like to have more water on hand just in case (& trust me, it's not a matter of we "might" need it, just a matter of when ;c) so if you can make yourself a system that offers more capacity like this... do it! The top 2 totes hold my RO filtered freshwater. Each has it's own float valve so when emptied will refill all by itself & shut off. When I empty a saltwater tub below I just open a freshwater valve & refill then add salt. Takes me less than 5 minutes to perform a water change & refill my saltwater tub for next week. :c) This picture also shows my sump under the water change rack. I did this to conserve space. Below you will see how it used to be - off to the side.
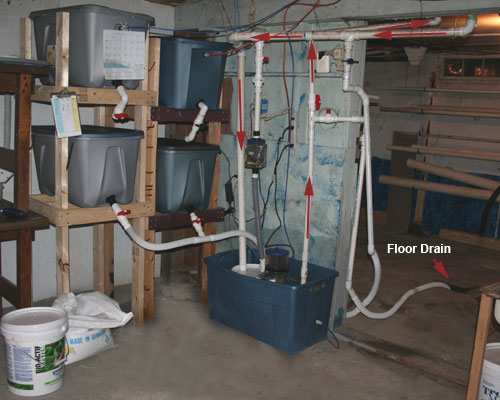
The below picture is of my old sump setup as I was using a submersible pump. This picture shows the flow of the water down from the tank to the sump (dump) as well as going up (return) to the tank from the pump. Focus on the dump pipe. Note how I positioned my sump so that my dump pipe coming down through the floor needed a 90 elbow then ran a couple feet horizontal then another 90 elbow etc. What I want to show you here is where I installed a 1.5" drain T on the horizontal, reduced on the bottom of the T to 1" PVC with a 1" ball valve so I can divert the dumping water to a floor drain (also noted in the pic). This allows me to siphon out of the tank upstairs & divert the junk I'm pulling to the drain - not into my sump. I just shut my system off & open the dump drain valve on the horizontal, go upstairs, take a hose & stick it into the back side of one overflow on the tank, start a siphon & whalla! I don't have to fill, haul & empty pails (& no spill mess too).
Your Cart
Login Form
Visitor Hours:
Walk-Ins
Saturday's
Noon to 3pm
See "What's New"
below for more info.
Newsletter
Reviews
- Very happy with toadstool from AquaCorals
I just received a fat cap toadstool from Penny at AquaCorals and highly recommend her! ...
Diana · Reviews · 3 days ago

Gift Certificates
Buy your Reefer a Gift Certificate!
AquaCorals Info
Service Center
Shipping Policies:
Penny's Friends